infoRouter MS Office Add-in Setup Installation using Group Policies
Prerequisites
Please create a shared folder on your network with “Read” access assigned to all users.
Copy the infoRouter office “Setup.msi” file to this share location.
The “Setup.msi” file can be found in the following path:
<infoRouterApplicationPath>/add-ins/office/setup.msi
Creating The InfoRouter Group Policy Package
On Windows 2003 server, navigate to the Control panel / Administrative Tools
Expand the “Active Directory Users and Computers” node
Right click on domain name and select the properties menu.
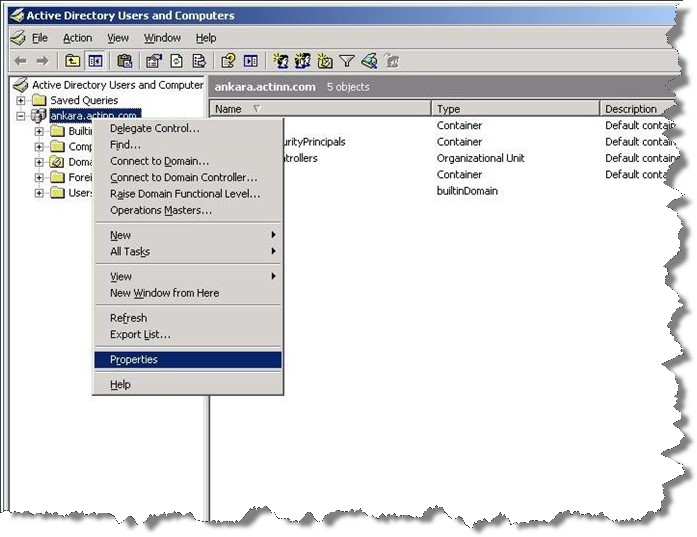
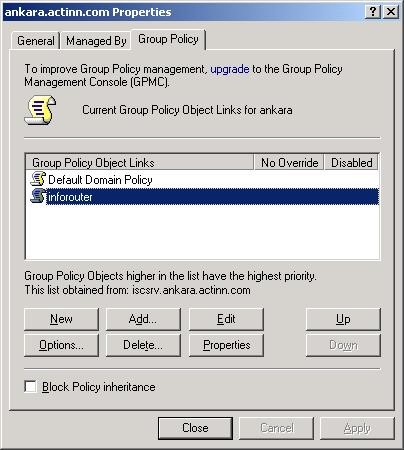
In the properties window that appears, switch the “Group Policy” tab.
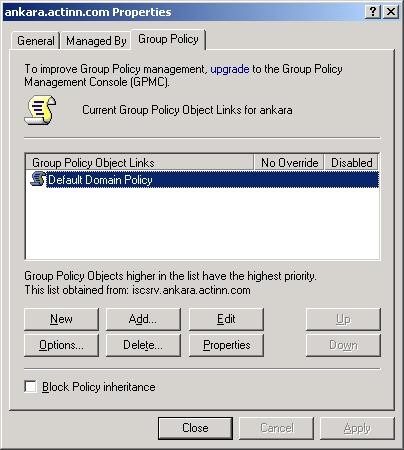
Click the “New” button to add a new group policy.
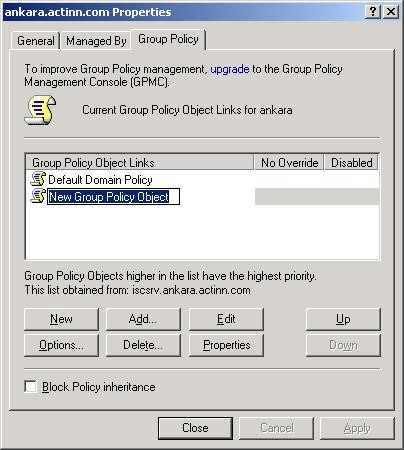
Rename the policy as “infoRouter”. Then click the “Edit” button.
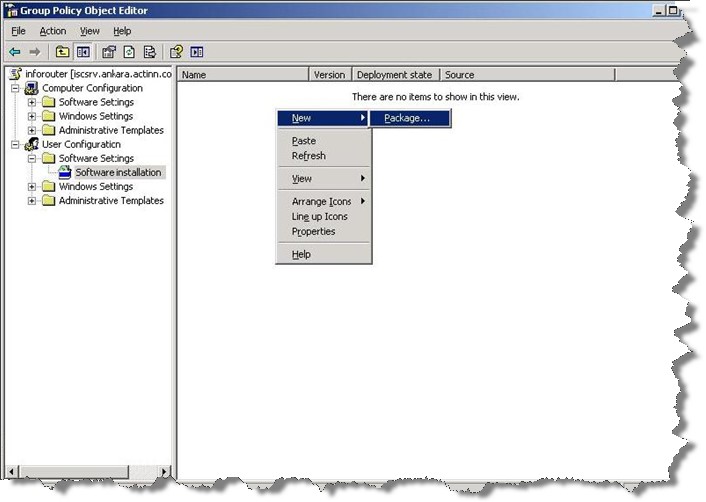
Expand the “User Configuration” node.
Expand the “Software Settings” node
Click on the “Software installation” node.
On the right hand panel, right click to select the “New / Package” menu item.
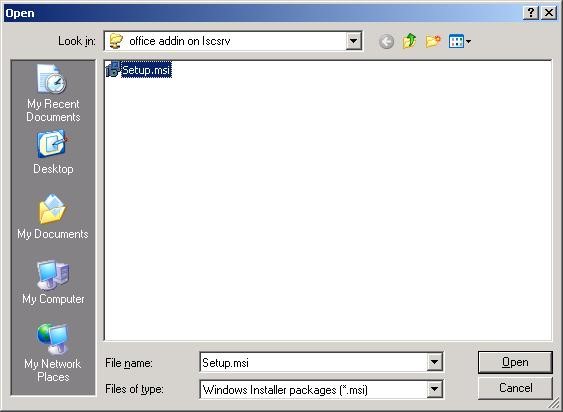
Select “Setup.msi” file from the Network Share you created earlier.
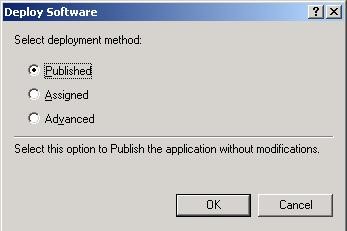
Choose the “Published” option and click on the OK button.
Right click on “infoRouter office package” and select the “Properties” menu.
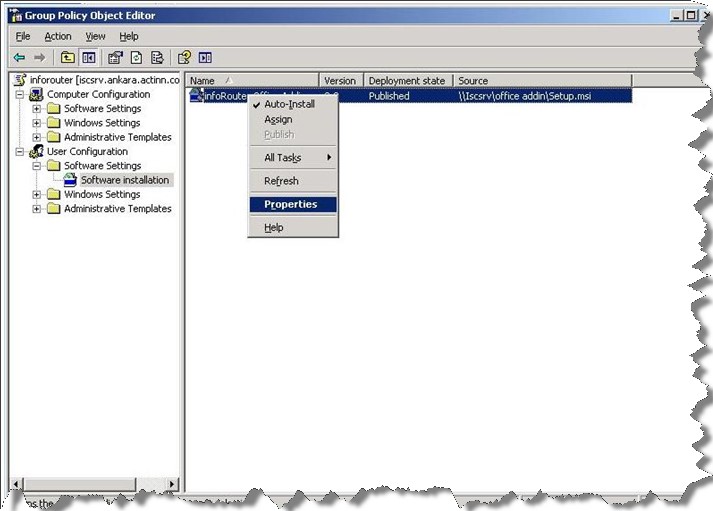
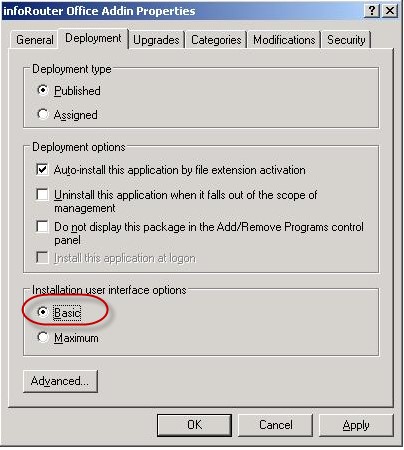
Switch to the “Deployment” tab.
Select the “Basic” option from “Installation user interface options” section.
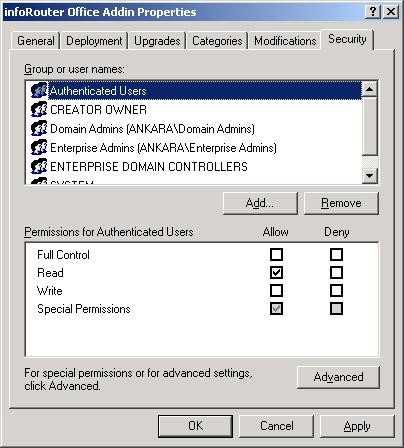
Switch to the “Security” tab.
Assign “Read” access to the “Authenticated Users” group, and click on the “OK” button.
Congratulations! You have successfully created a Group Policy package for infoRouter.
Now you authenticated users may install this package to their desktops.
Log in to the client machine using your domain account
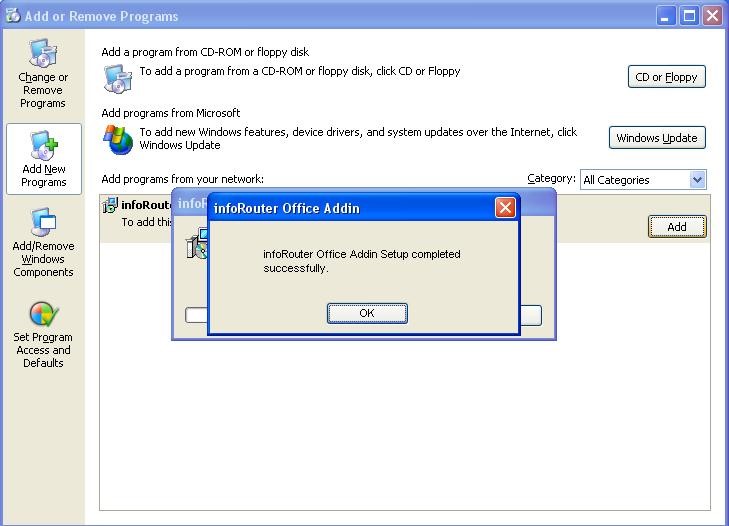
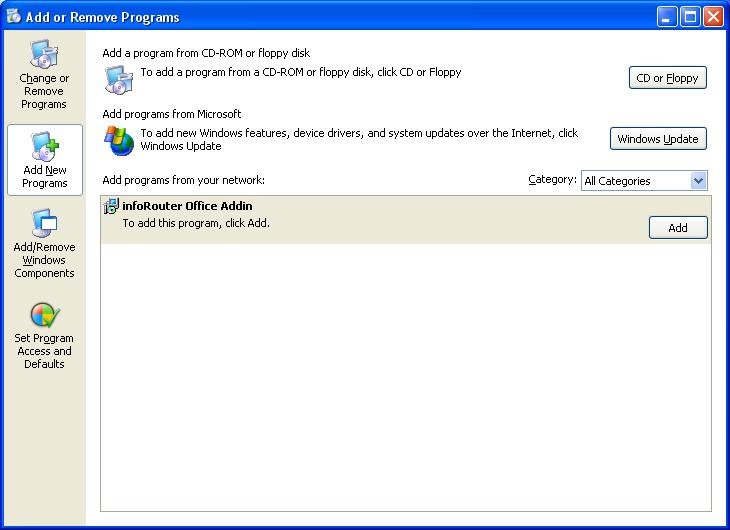
Open “Control Panel” / “Add Remove Programs”
Click “Add New Programs” on the left side of the dialog box.
Select the “infoRouter Office Add-in” package from the program list.
The infoRouter installation will be completed. When the install is complete, the following dialog box will be displayed.
